android通信服务器实现注册功能_安卓app与后台通信登陆注册-程序员宅基地
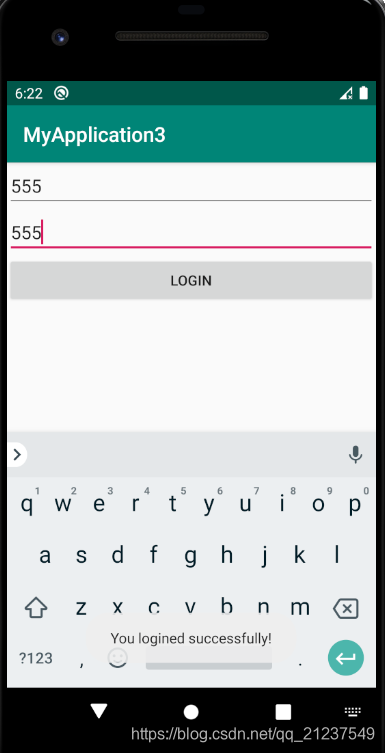
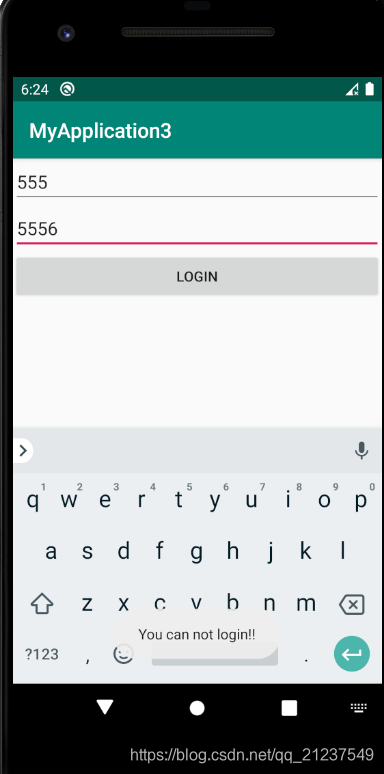
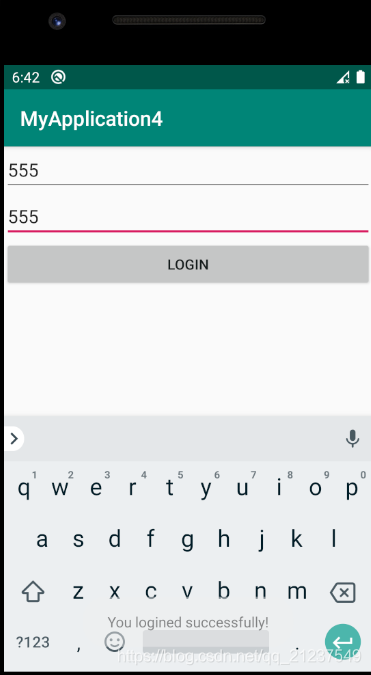
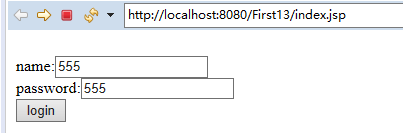
效果图:
数据库:

一些问题:
1.sdk28之后的版本(不可以http明文,所以要加网络安全设置network_security_config,详见后面的相应内容)
安卓import android.support.v7.app.AppCompatActivity报错?
试试导入
import androidx.appcompat.app.AppCompatActivity;
参考:https://blog.csdn.net/Baro_knight/article/details/96572357
2.sdk28之前的版本(可以http明文,所以默认)
无法导入import android.support.v7.app.AppCompatActivity
注意需要修改
用sdk28以下的话这两句需要删除,这样import android.support.v7.app.AppCompatActivity就能成功了
3.用sdk28以后发现http始终连不通
Android compileSdkVersion=28使用http请求报错not permitted by network security policy
问题: 由于 Android (版本27以上) 限制了明文流量的网络请求,非加密的流量请求都会被系统禁止掉。
如果当前应用的请求是 htttp 请求,而非 https ,这样就会导系统禁止当前应用进行该请求
推荐的做法是服务器和本地应用都改用 https ,测试时为了方便使用http,上线时应该都会用https才比较安全。
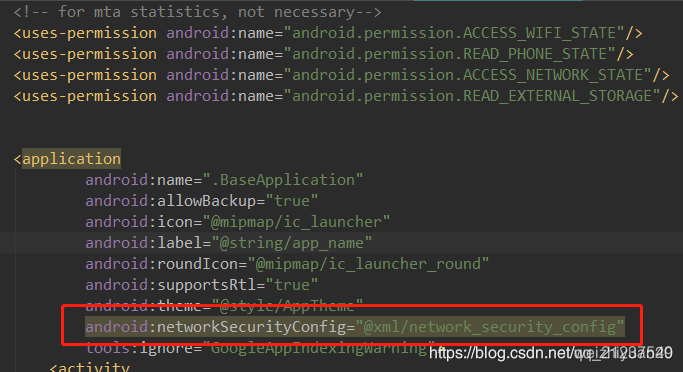
解决办法:在 res 下新建一个 xml 目录,然后创建一个名为:network_security_config.xml 文件 ,该文件内容如下:
<?xml version="1.0" encoding="utf-8"?>
<network-security-config>
<base-config cleartextTrafficPermitted="true" />
</network-security-config>
在 AndroidManifest.xml application增加配置android:networkSecurityConfig="@xml/network_security_config"
参考博客:https://blog.csdn.net/weizhiyuan20/article/details/88869613
下面演示了两个版本的完整代码与代码区别
方案一:用compileSdkVersion 29的方案一
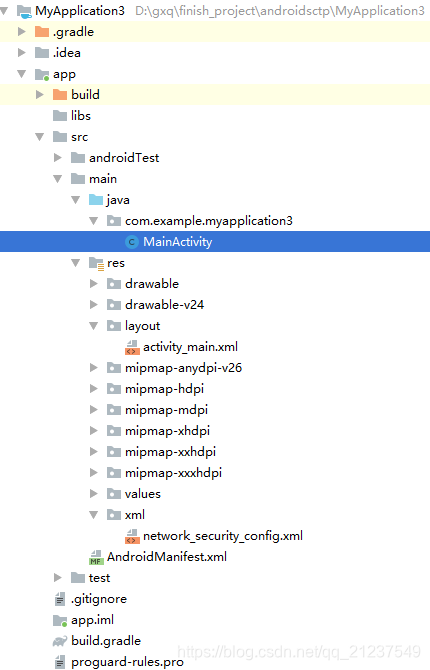
代码文件结构:
MainActivity.java
package com.example.myapplication3;

import android.os.Looper;
import androidx.appcompat.app.AppCompatActivity;
import android.os.Bundle;
import android.util.Log;
import android.view.View;
import android.widget.Button;
import android.widget.EditText;
import android.widget.Toast;

import java.io.BufferedReader;
import java.io.IOException;
import java.io.InputStream;
import java.io.InputStreamReader;
import java.net.HttpURLConnection;
import java.net.MalformedURLException;
import java.net.URL;

public class MainActivity extends AppCompatActivity {


    @Override
    protected void onCreate(Bundle savedInstanceState) {

        super.onCreate(savedInstanceState);
        setContentView(R.layout.activity_main);
        final EditText logname = (EditText) findViewById(R.id.logname);
        final EditText password = (EditText) findViewById(R.id.password);
        Button login = (Button) findViewById(R.id.login);
        login.setOnClickListener(new View.OnClickListener() {

            @Override
            public void onClick(View view) {

                final String name = logname.getText().toString().trim();
                final String psw = password.getText().toString().trim();
                new Thread(new Runnable() {

                    @Override
                    public void run() {

                        String path="http://192.168.191.1:8080/First13/mustLogin?logname="+name+"&password="+psw;
                        try {

                            try{

                                URL url = new URL(path); //新建url并实例化
                                HttpURLConnection connection = (HttpURLConnection) url.openConnection();
                                connection.setRequestMethod("GET");//获取服务器数据
                                connection.setReadTimeout(8000);//设置读取超时的毫秒数
                                connection.setConnectTimeout(8000);//设置连接超时的毫秒数
                                InputStream in = connection.getInputStream();
                                BufferedReader reader = new BufferedReader(new InputStreamReader(in));
                                String result = reader.readLine();//读取服务器进行逻辑处理后页面显示的数据
                                Log.d("MainActivity","run: "+result);
                                if (result.equals("login successfully!")){

                                    Log.d("MainActivity","run2: "+result);
                                    Looper.prepare();
                                    Log.d("MainActivity","run3: "+result);
                                    Toast.makeText(MainActivity.this,"You logined successfully!",Toast.LENGTH_SHORT).show();
                                    Log.d("MainActivity","run4: "+result);
                                    Looper.loop();
                                }else if(result.equals("can not login!")){

                                    Looper.prepare();
                                    Toast.makeText(MainActivity.this,"You can not login!!",Toast.LENGTH_SHORT).show();
                                    Looper.loop();
                                }
                            }catch (MalformedURLException e){
    }
                        } catch (IOException e) {

                            e.printStackTrace();
                        }
                    }
                }).start();
            }
        });
    }
}
activity_main.xml
<?xml version="1.0" encoding="utf-8"?>
<LinearLayout xmlns:android="http://schemas.android.com/apk/res/android"
    android:orientation="vertical" android:layout_width="match_parent"
    android:layout_height="match_parent">

    <EditText
        android:id="@+id/logname"
        android:layout_width="match_parent"
        android:layout_height="wrap_content"
        android:hint="Your name"
        android:ems="10" />

    <EditText
        android:id="@+id/password"
        android:layout_width="match_parent"
        android:layout_height="wrap_content"
        android:ems="10"
        android:hint="Your password" />

    <Button
        android:id="@+id/login"
        android:layout_width="match_parent"
        android:layout_height="wrap_content"
        android:text="Login" />
</LinearLayout>
AndroidManifest.xml
<?xml version="1.0" encoding="utf-8"?>
<manifest xmlns:android="http://schemas.android.com/apk/res/android"
    package="com.example.myapplication3">
    <uses-permission android:name="android.permission.INTERNET"/>
    <application
        android:networkSecurityConfig="@xml/network_security_config"
        android:allowBackup="true"
        android:icon="@mipmap/ic_launcher"
        android:label="@string/app_name"
        android:roundIcon="@mipmap/ic_launcher_round"
        android:supportsRtl="true"
        android:theme="@style/AppTheme">
        <activity android:name=".MainActivity">
            <intent-filter>
                <action android:name="android.intent.action.MAIN" />

                <category android:name="android.intent.category.LAUNCHER" />
            </intent-filter>
        </activity>
    </application>

</manifest>
build.gradle就用默认的就可以
apply plugin: 'com.android.application'

android {

    compileSdkVersion 29
    buildToolsVersion "29.0.2"
    defaultConfig {

        applicationId "com.example.myapplication3"
        minSdkVersion 14
        targetSdkVersion 29
        versionCode 1
        versionName "1.0"
        testInstrumentationRunner "androidx.test.runner.AndroidJUnitRunner"
    }
    buildTypes {

        release {

            minifyEnabled false
            proguardFiles getDefaultProguardFile('proguard-android-optimize.txt'), 'proguard-rules.pro'
        }
    }
}

dependencies {

    implementation fileTree(dir: 'libs', include: ['*.jar'])
    implementation 'androidx.appcompat:appcompat:1.1.0'
    implementation 'androidx.constraintlayout:constraintlayout:1.1.3'
    testImplementation 'junit:junit:4.12'
    androidTestImplementation 'androidx.test.ext:junit:1.1.1'
    androidTestImplementation 'androidx.test.espresso:espresso-core:3.2.0'
}
注意现在要用http明文传输,在res中创建一个xml文件夹,然后在里面创建一个network_security_config.xml,里面的内容如下:
<?xml version="1.0" encoding="utf-8"?>
<network-security-config>
<base-config cleartextTrafficPermitted="true" />
</network-security-config>
这个xml的引用在AndroidManifest.xml中,在application中加入这个引用

必须得设置,不然无法连接与服务器传数据
方案二:用compileSdkVersion 26
效果同
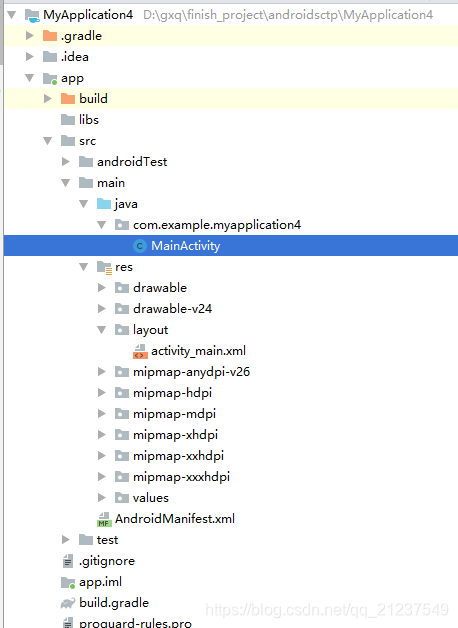
文件目录:
MainActivity.java
package com.example.myapplication4;

import android.os.Looper;
import android.support.v7.app.AppCompatActivity;
import android.os.Bundle;
import android.util.Log;
import android.view.View;
import android.widget.Button;
import android.widget.EditText;
import android.widget.Toast;

import java.io.BufferedReader;
import java.io.IOException;
import java.io.InputStream;
import java.io.InputStreamReader;
import java.net.HttpURLConnection;
import java.net.MalformedURLException;
import java.net.URL;

public class MainActivity extends AppCompatActivity {


    @Override
    protected void onCreate(Bundle savedInstanceState) {

        super.onCreate(savedInstanceState);
        setContentView(R.layout.activity_main);
        final EditText logname = (EditText) findViewById(R.id.logname);
        final EditText password = (EditText) findViewById(R.id.password);
        Button login = (Button) findViewById(R.id.login);
        login.setOnClickListener(new View.OnClickListener() {

            @Override
            public void onClick(View view) {

                final String name = logname.getText().toString().trim();
                final String psw = password.getText().toString().trim();
                new Thread(new Runnable() {

                    @Override
                    public void run() {

                        String path="http://192.168.191.1:8080/First13/mustLogin?logname="+name+"&password="+psw;
                        try {

                            try{

                                URL url = new URL(path); //新建url并实例化
                                HttpURLConnection connection = (HttpURLConnection) url.openConnection();
                                connection.setRequestMethod("GET");//获取服务器数据
                                connection.setReadTimeout(8000);//设置读取超时的毫秒数
                                connection.setConnectTimeout(8000);//设置连接超时的毫秒数
                                InputStream in = connection.getInputStream();
                                BufferedReader reader = new BufferedReader(new InputStreamReader(in));
                                String result = reader.readLine();//读取服务器进行逻辑处理后页面显示的数据
                                Log.d("MainActivity","run: "+result);
                                if (result.equals("login successfully!")){

                                    Log.d("MainActivity","run2: "+result);
                                    Looper.prepare();
                                    Log.d("MainActivity","run3: "+result);
                                    Toast.makeText(MainActivity.this,"You logined successfully!",Toast.LENGTH_SHORT).show();
                                    Log.d("MainActivity","run4: "+result);
                                    Looper.loop();
                                }else if(result.equals("can not login!")){

                                    Looper.prepare();
                                    Toast.makeText(MainActivity.this,"You can not login!!",Toast.LENGTH_SHORT).show();
                                    Looper.loop();
                                }
                            }catch (MalformedURLException e){
    }
                        } catch (IOException e) {

                            e.printStackTrace();
                        }
                    }
                }).start();
            }
        });
    }
}
activity_main.xml
<?xml version="1.0" encoding="utf-8"?>
<LinearLayout xmlns:android="http://schemas.android.com/apk/res/android"
    android:orientation="vertical" android:layout_width="match_parent"
    android:layout_height="match_parent">

    <EditText
        android:id="@+id/logname"
        android:layout_width="match_parent"
        android:layout_height="wrap_content"
        android:hint="Your name"
        android:ems="10" />

    <EditText
        android:id="@+id/password"
        android:layout_width="match_parent"
        android:layout_height="wrap_content"
        android:ems="10"
        android:hint="Your password" />

    <Button
        android:id="@+id/login"
        android:layout_width="match_parent"
        android:layout_height="wrap_content"
        android:text="Login" />
</LinearLayout>
AndroidManifest.xml:
<?xml version="1.0" encoding="utf-8"?>
<manifest xmlns:android="http://schemas.android.com/apk/res/android"
    package="com.example.myapplication4">

    <application
        android:allowBackup="true"
        android:icon="@mipmap/ic_launcher"
        android:label="@string/app_name"
        android:roundIcon="@mipmap/ic_launcher_round"
        android:supportsRtl="true"
        android:theme="@style/AppTheme">
        <activity android:name=".MainActivity">
            <intent-filter>
                <action android:name="android.intent.action.MAIN" />

                <category android:name="android.intent.category.LAUNCHER" />
            </intent-filter>
        </activity>
    </application>
    <uses-permission android:name="android.permission.INTERNET"/>
</manifest>
build.gradle
apply plugin: 'com.android.application'

android {

    compileSdkVersion 26
    defaultConfig {

        applicationId "com.example.gahui.httptest"
        minSdkVersion 15
        targetSdkVersion 26
        versionCode 1
        versionName "1.0"
        testInstrumentationRunner "android.support.test.runner.AndroidJUnitRunner"
    }
    buildTypes {

        release {

            minifyEnabled false
            proguardFiles getDefaultProguardFile('proguard-android.txt'), 'proguard-rules.pro'
        }
    }
}

dependencies {

    implementation fileTree(dir: 'libs', include: ['*.jar'])
    implementation 'com.android.support:appcompat-v7:26.0.0-beta1'
    implementation 'com.android.support.constraint:constraint-layout:1.0.2'
    testImplementation 'junit:junit:4.12'
    androidTestImplementation 'com.android.support.test:runner:1.0.1'
    androidTestImplementation 'com.android.support.test.espresso:espresso-core:3.0.1'
}
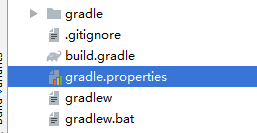
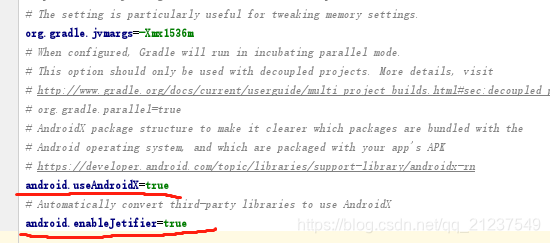
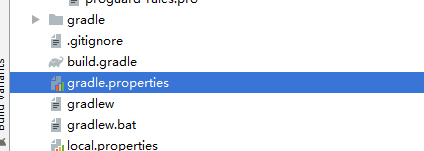
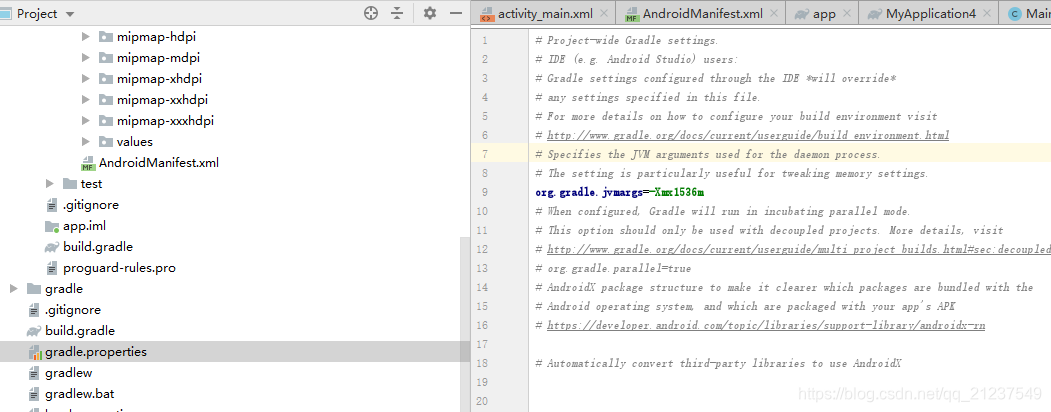
注意这里最外面的gradle.properties中的有些语句需要删除
参考:
https://blog.csdn.net/qq_36005498/article/details/104099785?depth_1-utm_source=distribute.pc_relevant.none-task&utm_source=distribute.pc_relevant.none-task
不然会
错误: 程序包android.support.v7.app不存在解决
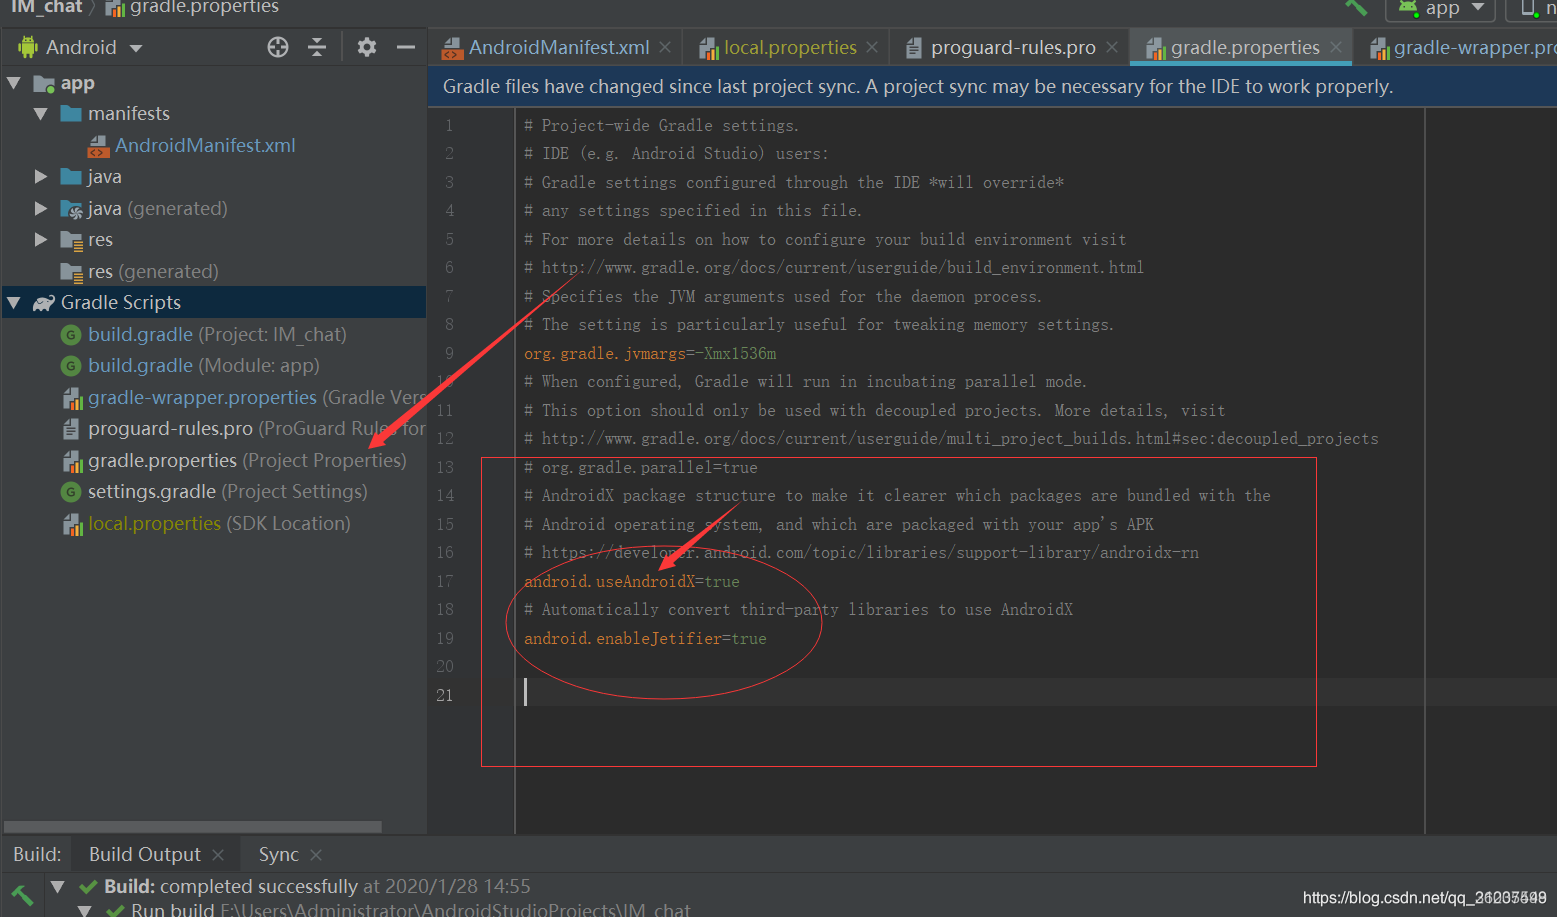
原因是新版的Android Studio在创建一个新的项目的时候,会比之前的项目中多配置这2个选项,大概意思是用新的AndroidX这个东西,这就导致老版本的程序包被忽略掉了,所以在使用代码中的import语句会出现如题错误。
删除即可正常运行
HttpResponse response=client.execute(post);空指针问题
1、在AndroidManifest.xml 里面加上访问网络的权限 ,如果没有加,则会抛出警告。
2、Android 4.0以上不能在主线程中对网络数据的请求,需要重新起一个线程。

参考:http://blog.sina.com.cn/s/blog_859977de0102vd40.html
服务器方面
服务器文件目录:
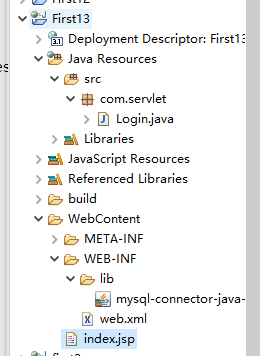
index.jsp
<%@ page language="java" contentType="text/html; charset=ISO-8859-1"
    pageEncoding="ISO-8859-1"%>
<!DOCTYPE html PUBLIC "-//W3C//DTD HTML 4.01 Transitional//EN" "http://www.w3.org/TR/html4/loose.dtd">
<html>
<head>
<meta http-equiv="Content-Type" content="text/html; charset=ISO-8859-1">
<title>welcome</title>
</head>
<body>
<form action="mustLogin" method="post">
<br>
	name:<input type="text" name="logname">
<br>password:<input type="text" name="password">
<br><input type="submit" value="login">
</form>
</body>
</html>
Login.java
package com.servlet;

import java.io.IOException;
import java.io.PrintWriter;
import java.sql.Connection;
import java.sql.DriverManager;
import java.sql.ResultSet;
import java.sql.SQLException;
import java.sql.Statement;

import javax.servlet.ServletConfig;
import javax.servlet.ServletException;
import javax.servlet.annotation.WebServlet;
import javax.servlet.http.HttpServlet;
import javax.servlet.http.HttpServletRequest;
import javax.servlet.http.HttpServletResponse;

/**
 * Servlet implementation class LoginTest
 */
@WebServlet("/LoginTest")
public class Login extends HttpServlet {

	private static final long serialVersionUID = 1L;

    /**
     * @see HttpServlet#HttpServlet()
     */
    public Login() {

        super();
        // TODO Auto-generated constructor stub
    }
    public void init(ServletConfig config) throws ServletException {

		// TODO Auto-generated method stub
		super.init(config);
		try {

			Class.forName("com.mysql.cj.jdbc.Driver");
		} catch (Exception e) {

			// TODO Auto-generated catch block
			e.printStackTrace();
		}
	}
	/**
	 * @see HttpServlet#doGet(HttpServletRequest request, HttpServletResponse response)
	 */
	protected void doGet(HttpServletRequest request, HttpServletResponse response) throws ServletException, IOException {

		// TODO Auto-generated method stub
		response.setContentType("text/html;charset=utf-8");
		PrintWriter out = response.getWriter();
		Connection con;
		Statement sql;
		String logname = request.getParameter("logname").trim();
		String password = request.getParameter("password").trim();
		String uri = "jdbc:mysql://localhost/MakeFriend?useSSL=false&serverTimezone=UTC";
		try {

			con = DriverManager.getConnection(uri,"root","gunxueqiu");
			String condition = "select * from member where logname = '"+logname+"' and password = '"+password+"'";
			sql = con.prepareStatement(condition);
			ResultSet rSet = sql.executeQuery(condition);
			if(rSet.next()) {

				out.println("login successfully!");
			}
			else {

				out.println("can not login!");
			}
			con.close();
		} catch (SQLException e) {

			// TODO Auto-generated catch block
			e.printStackTrace();
		}
	}

	/**
	 * @see HttpServlet#doPost(HttpServletRequest request, HttpServletResponse response)
	 */
	protected void doPost(HttpServletRequest request, HttpServletResponse response) throws ServletException, IOException {

		// TODO Auto-generated method stub
		doGet(request, response);
	}

}
web.xml
<?xml version="1.0" encoding="UTF-8"?>
<web-app xmlns:xsi="http://www.w3.org/2001/XMLSchema-instance" xmlns="http://xmlns.jcp.org/xml/ns/javaee" xsi:schemaLocation="http://xmlns.jcp.org/xml/ns/javaee http://xmlns.jcp.org/xml/ns/javaee/web-app_3_1.xsd" id="WebApp_ID" version="3.1">
  <display-name>First13</display-name>
  <welcome-file-list>
    <welcome-file>index.html</welcome-file>
    <welcome-file>index.htm</welcome-file>
    <welcome-file>index.jsp</welcome-file>
    <welcome-file>default.html</welcome-file>
    <welcome-file>default.htm</welcome-file>
    <welcome-file>default.jsp</welcome-file>
  </welcome-file-list>
  <servlet>
    <servlet-name>Login</servlet-name>
    <servlet-class>com.servlet.Login</servlet-class>
  </servlet>
  <servlet-mapping>
    <servlet-name>Login</servlet-name>
    <url-pattern>/mustLogin</url-pattern>
  </servlet-mapping>
  <servlet>
    <servlet-name>Test</servlet-name>
    <servlet-class>com.servlet.Test</servlet-class>
  </servlet>
  <servlet-mapping>
    <servlet-name>Test</servlet-name>
    <url-pattern>/mustTest</url-pattern>
  </servlet-mapping>
</web-app>
别忘了与数据库相应连上对应jdbc
服务器可以直接用index.jsp作为网页测试

成功!!!
注意:如果想用192.168.191.1访问,即本地局域网,则要先开启无线wifi,不然始终无法访问。
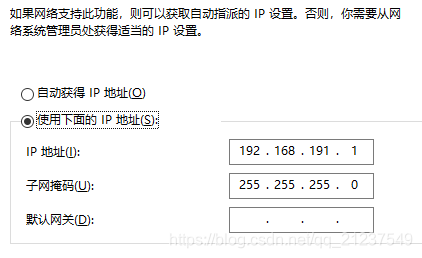

开启后即能访问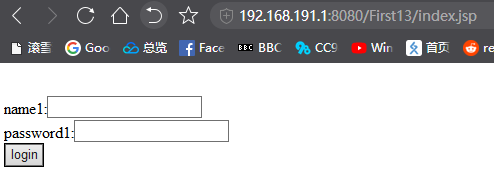
哪怕关闭之后也能,除非关机,那么再次开机需要再次开启局域网wifi。
智能推荐
c# 调用c++ lib静态库_c#调用lib-程序员宅基地
文章浏览阅读2w次,点赞7次,收藏51次。四个步骤1.创建C++ Win32项目动态库dll 2.在Win32项目动态库中添加 外部依赖项 lib头文件和lib库3.导出C接口4.c#调用c++动态库开始你的表演...①创建一个空白的解决方案,在解决方案中添加 Visual C++ , Win32 项目空白解决方案的创建:添加Visual C++ , Win32 项目这......_c#调用lib
deepin/ubuntu安装苹方字体-程序员宅基地
文章浏览阅读4.6k次。苹方字体是苹果系统上的黑体,挺好看的。注重颜值的网站都会使用,例如知乎:font-family: -apple-system, BlinkMacSystemFont, Helvetica Neue, PingFang SC, Microsoft YaHei, Source Han Sans SC, Noto Sans CJK SC, W..._ubuntu pingfang
html表单常见操作汇总_html表单的处理程序有那些-程序员宅基地
文章浏览阅读159次。表单表单概述表单标签表单域按钮控件demo表单标签表单标签基本语法结构<form action="处理数据程序的url地址“ method=”get|post“ name="表单名称”></form><!--action,当提交表单时,向何处发送表单中的数据,地址可以是相对地址也可以是绝对地址--><!--method将表单中的数据传送给服务器处理,get方式直接显示在url地址中,数据可以被缓存,且长度有限制;而post方式数据隐藏传输,_html表单的处理程序有那些
PHP设置谷歌验证器(Google Authenticator)实现操作二步验证_php otp 验证器-程序员宅基地
文章浏览阅读1.2k次。使用说明:开启Google的登陆二步验证(即Google Authenticator服务)后用户登陆时需要输入额外由手机客户端生成的一次性密码。实现Google Authenticator功能需要服务器端和客户端的支持。服务器端负责密钥的生成、验证一次性密码是否正确。客户端记录密钥后生成一次性密码。下载谷歌验证类库文件放到项目合适位置(我这边放在项目Vender下面)https://github.com/PHPGangsta/GoogleAuthenticatorPHP代码示例://引入谷_php otp 验证器
【Python】matplotlib.plot画图横坐标混乱及间隔处理_matplotlib更改横轴间距-程序员宅基地
文章浏览阅读4.3k次,点赞5次,收藏11次。matplotlib.plot画图横坐标混乱及间隔处理_matplotlib更改横轴间距
docker — 容器存储_docker 保存容器-程序员宅基地
文章浏览阅读2.2k次。①Storage driver 处理各镜像层及容器层的处理细节,实现了多层数据的堆叠,为用户 提供了多层数据合并后的统一视图②所有 Storage driver 都使用可堆叠图像层和写时复制(CoW)策略③docker info 命令可查看当系统上的 storage driver主要用于测试目的,不建议用于生成环境。_docker 保存容器
随便推点
网络拓扑结构_网络拓扑csdn-程序员宅基地
文章浏览阅读834次,点赞27次,收藏13次。网络拓扑结构是指计算机网络中各组件(如计算机、服务器、打印机、路由器、交换机等设备)及其连接线路在物理布局或逻辑构型上的排列形式。这种布局不仅描述了设备间的实际物理连接方式,也决定了数据在网络中流动的路径和方式。不同的网络拓扑结构影响着网络的性能、可靠性、可扩展性及管理维护的难易程度。_网络拓扑csdn
JS重写Date函数,兼容IOS系统_date.prototype 将所有 ios-程序员宅基地
文章浏览阅读1.8k次,点赞5次,收藏8次。IOS系统Date的坑要创建一个指定时间的new Date对象时,通常的做法是:new Date("2020-09-21 11:11:00")这行代码在 PC 端和安卓端都是正常的,而在 iOS 端则会提示 Invalid Date 无效日期。在IOS年月日中间的横岗许换成斜杠,也就是new Date("2020/09/21 11:11:00")通常为了兼容IOS的这个坑,需要做一些额外的特殊处理,笔者在开发的时候经常会忘了兼容IOS系统。所以就想试着重写Date函数,一劳永逸,避免每次ne_date.prototype 将所有 ios
如何将EXCEL表导入plsql数据库中-程序员宅基地
文章浏览阅读5.3k次。方法一:用PLSQL Developer工具。 1 在PLSQL Developer的sql window里输入select * from test for update; 2 按F8执行 3 打开锁, 再按一下加号. 鼠标点到第一列的列头,使全列成选中状态,然后粘贴,最后commit提交即可。(前提..._excel导入pl/sql
Git常用命令速查手册-程序员宅基地
文章浏览阅读83次。Git常用命令速查手册1、初始化仓库git init2、将文件添加到仓库git add 文件名 # 将工作区的某个文件添加到暂存区 git add -u # 添加所有被tracked文件中被修改或删除的文件信息到暂存区,不处理untracked的文件git add -A # 添加所有被tracked文件中被修改或删除的文件信息到暂存区,包括untracked的文件...
分享119个ASP.NET源码总有一个是你想要的_千博二手车源码v2023 build 1120-程序员宅基地
文章浏览阅读202次。分享119个ASP.NET源码总有一个是你想要的_千博二手车源码v2023 build 1120
【C++缺省函数】 空类默认产生的6个类成员函数_空类默认产生哪些类成员函数-程序员宅基地
文章浏览阅读1.8k次。版权声明:转载请注明出处 http://blog.csdn.net/irean_lau。目录(?)[+]1、缺省构造函数。2、缺省拷贝构造函数。3、 缺省析构函数。4、缺省赋值运算符。5、缺省取址运算符。6、 缺省取址运算符 const。[cpp] view plain copy_空类默认产生哪些类成员函数