一文让你彻底弄懂 “vue-style-loader” 跟 “style-loader” 区别-程序员宅基地
技术标签: 前端框架 1024程序员节 vue style-loader
简介
用过 vue-cli 脚手架搭建 vue 项目都知道,vue-cli 中内置了 vue-style-loader 去加载样式模块,最后通过 <style> 标签把样式加载到页面,但是 style-loader 同样可以达到同样的效果,那么 vue 官方为啥还封装一个 vue-style-loader 库呢?那么它们到底有啥区别?平时项目中又该如何选择呢?
开始
为了更好的去分析这两个库,我们简单的搭建一个 vue 项目。
其实如果对 webpack 很熟悉的话,从 0 开始搭建一个 vue 项目就很简单了,所以强烈推荐大家去看一下我上一篇 webpack 的文章,来和 webpack 谈场恋爱吧。
首先创建一个目录叫 style-loader-demo,然后初始化 npm:
mkdir style-loader-demo && cd style-loader-demo && npm init
接下来我们需要安装 webpack 相关的依赖:
安装 webpack
webpack 核心库。
在工程目录 style-loader-demo 执行以下命令安装 webpack:
npm install -D webpack --registry https://registry.npm.taobao.org
安装 webpack-cli
webpack 指令库。
在工程目录 style-loader-demo 执行以下命令:
npm install -D webpack-cli --registry https://registry.npm.taobao.org
安装 webpack-dev-server
webpack 开发者服务框架。
在工程目录 style-loader-demo 执行以下命令:
npm install -D webpack-dev-server --registry https://registry.npm.taobao.org
安装 webpack-chain
webpack 配置工具。
在工程目录 style-loader-demo 执行以下命令:
npm install -D webpack-chain --registry https://registry.npm.taobao.org
创建 webpack 配置
在工程目录 style-loader-demo 下创建一个 webpack.config.js 文件:
touch webpack.config.js
然后对 webpack.config.js 进行配置,用 webpack-chain 导入一个 webpack 配置:
const config = new (require('webpack-chain'))();

module.exports = config.toConfig();
为了开发方便,我们在 package.json 中声明两个脚本 build 跟 dev:
{

  "name": "style-loader-demo",
  "version": "1.0.0",
  "description": "",
  "main": "index.js",
  "scripts": {

    "test": "echo \"Error: no test specified\" && exit 1",
    "build": "rimraf dist && webpack --mode=production",
    "dev": "webpack-dev-server --mode=development --progress"
  },
  "author": "",
  "license": "ISC",
  "devDependencies": {

    "css-loader": "^5.0.0",
    "html-webpack-plugin": "^4.5.0",
    "style-loader": "^2.0.0",
    "vue-style-loader": "^4.1.2",
    "webpack": "^4.44.2",
    "webpack-chain": "^6.5.1",
    "webpack-cli": "^3.3.12",
    "webpack-dev-server": "^3.11.0"
  },
  "dependencies": {

    "vue": "^2.6.12",
    "vue-loader": "^15.9.3",
    "vue-template-compiler": "^2.6.12"
  }
}
入口与出口
我们首先在工程目录 style-loader-demo 下创建一个 src 目录,然后在 src 目录下创建一个 main.s 文件:
mkdir src && cd src && touch main.js && cd ..
然后我们找到 webpack.config.js 文件,对 webpack 的入口和出口进行配置:
const path = require('path');
const config = new (require('webpack-chain'))();
config
    .context(path.resolve(__dirname, '.')) // webpack 上下文目录为项目根目录
        .entry('app') // 入口文件名称为 app
        .add('./src/main.js') // 入口文件为 ./src/main.ts
        .end()
    .output
        .path(path.join(__dirname, './dist')) // webpack 输出的目录为根目录的 dist 目录
        .filename('[name].[hash:8].js') // 打包出来的 bundle 名称为 "[name].[hash:8].js"
        .publicPath('/') // publicpath 配置为 "/"
        .end()
安装 vue
vue 核心 API。
npm install vue --registry https://registry.npm.taobao.org
安装 vue-loader
.vue 文件加载器。
npm install vue-loader --registry https://registry.npm.taobao.org
安装 vue-template-compiler
.vue 文件模版解析器。
npm install vue-template-compiler --registry https://registry.npm.taobao.org
安装 html-webpack-plugin
npm install -D html-webpack-plugin --registry https://registry.npm.taobao.org
接下来我们在工程目录 sy_webpack-wedding 底下创建一个 public 目录,然后在 public 目录下创建一个 index.html 文件作为我们 app 的入口页面:
mkdir public && touch public/index.html
然后将以下内容写入 public/index.html:
<!DOCTYPE html>
<html lang="en">
  <head>
    <meta charset="UTF-8" />
    <title>Title</title>
  </head>
  <body>
    <noscript>your browser should support javascript!</noscript>
    <div id="app"></div>
    <!-- html-webpack-plugin 将自动引入入口文件 -->
  </body>
</html>
安装 css-loader
css 模块加载器。
npm install -D css-loader --registry https://registry.npm.taobao.org
安装 vue-style-loader
npm install -D vue-style-loader --registry https://registry.npm.taobao.org
安装 style-loader
npm install -D style-loader --registry https://registry.npm.taobao.org
配置 webpack.config.js
webpack 配置全部内容:
const path = require('path');
const config = new (require('webpack-chain'))();
config
    .context(path.resolve(__dirname, '.')) // webpack 上下文目录为项目根目录
    .entry('app') // 入口文件名称为 app
        .add('./src/main.js') // 入口文件为 ./src/main.ts
        .end()
    .output
        .path(path.join(__dirname, './dist')) // webpack 输出的目录为根目录的 dist 目录
        .filename('[name].[hash:8].js') // 打包出来的 bundle 名称为 "[name].[hash:8].js"
        .publicPath('/') // publicpath 配置为 "/"
        .end()
    .resolve
        .extensions
            .add('.js')
            .add('.vue') // 配置以 .js 等结尾的文件当模块使用的时候都可以省略后缀
            .end()
        .end()
    .module
        .rule('vue') // vue-loader 相关配置
            .test(/\.vue$/) // 匹配 .vue 文件
            .use('vue-loader')
                .loader('vue-loader')
                .end()
            .end()
        .rule('css') // css-loader 相关配置
            .test(/\.css$/)
            .use('vue-style-loader')
                .loader('vue-style-loader')
                .end()
            .use('css-loader')
                .loader('css-loader')
                .options({

                    esModule: false
                })
                .end()
            .end()
        .end()
    .plugin('vue-loader-plugin') // vue-loader 必须要添加 vue-loader-plugin
        .use(require('vue-loader').VueLoaderPlugin, [])
        .end()
    .plugin('html') // 添加 html-webpack-plugin 插件
        .use(require('html-webpack-plugin'), [
            {

                template: path.resolve(__dirname, './public/index.html'), // 指定模版文件
                chunks: ['app'], // 指定需要加载的 chunk
                inject: 'body', // 指定 script 脚本注入的位置为 body
            },
        ])
        .end()
    .devServer
        .host('0.0.0.0') // 服务器外部可访问
        .disableHostCheck(true) // 关闭白名单校验
        .contentBase(path.resolve(__dirname, './public')) // 设置一个 express 静态目录
        .historyApiFallback({

            disableDotRule: true, // 禁止在链接中使用 "." 符号
            rewrites: [
                {
     from: /^\/$/, to: '/index.html' }, // 将所有的 404 响应重定向到 index.html 页面
            ],
        })
        .port(8080) // 当前端口号
        .hot(true) // 打开页面热载功能
        .sockPort('location') // 设置成平台自己的端口
        .open(true);
module.exports = config.toConfig();
测试
我们在 src 目录下创建一个 app.vue 文件:
touch src/app.vue
然后将以下内容写入其中:
<template>
    <div class="app">{
   { msg }}</div>
</template>

<script>
export default {
    name: "app",
    data(){
        return {
            msg: "hello"
        }
    }
}
</script>
<style scoped>
    .app {
        color: red;
    }
</style>
很简单,就是一个简单的 vue 文件。
然后在 main.js 中引入 app.vue 文件:
import Vue from 'vue';
import App from './app.vue';
new Vue({

    el: '#app',
    render: (h) => h(App),
});
ok!一切准备完毕后,我们直接在工程目录运行 npm run dev 命令:
npm run dev
运行完毕后浏览器打开:
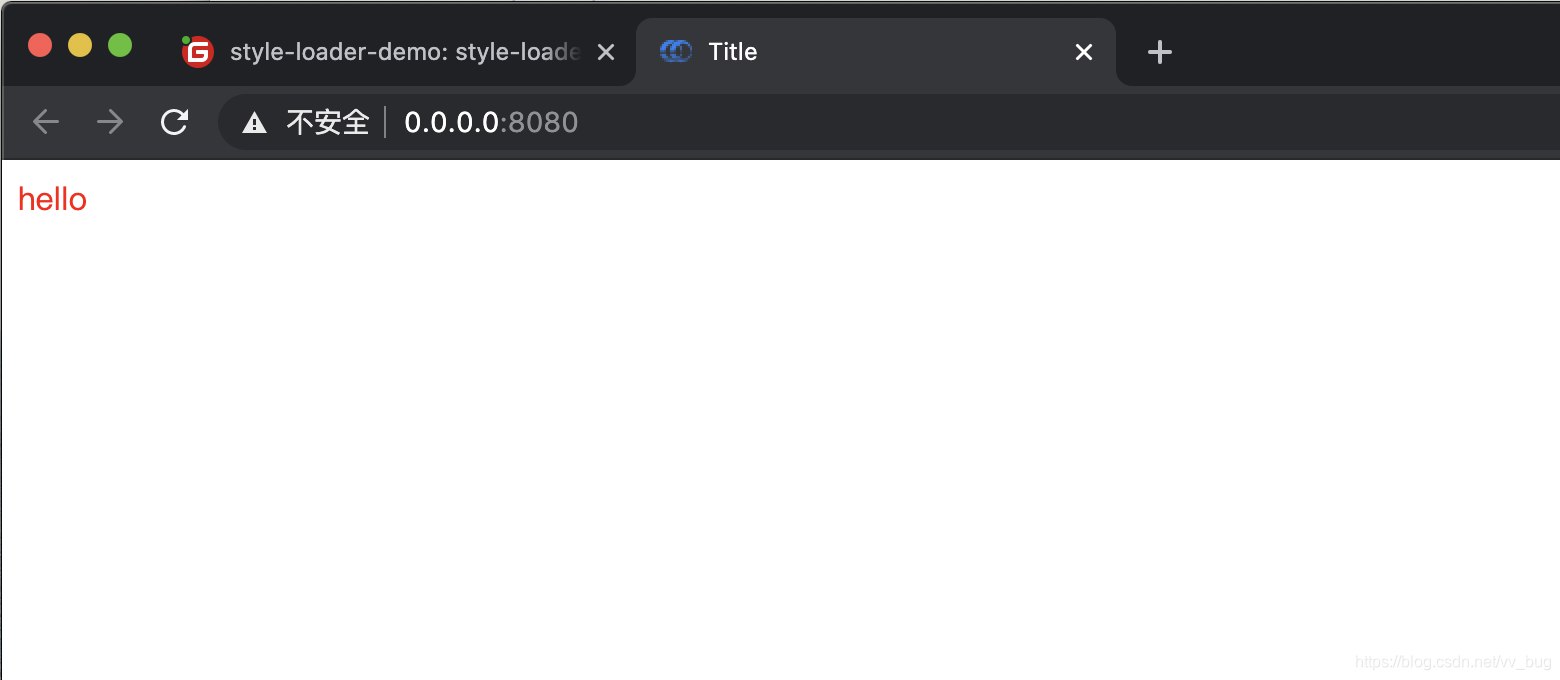
跟不上的童鞋可以直接下载源码:https://gitee.com/vv_bug/style-loader-demo
vue-style-loader
官网地址:https://github.com/vuejs/vue-style-loader
This is a fork based on style-loader. Similar to
style-loader, you can chain it aftercss-loaderto dynamically inject CSS into the document as style tags. However, since this is included as a dependency and used by default invue-loader, in most cases you don’t need to configure this loader yourself.
意思大概是:“基于 style-loader fork 过来的,跟 style-loader 类似。”
官网解释的还是比较敷衍的,我们结合 Demo 继续往下看。
看一下现在的设置,我们找到 webpack.config.js:
const path = require('path');
const config = new (require('webpack-chain'))();
config
    .context(path.resolve(__dirname, '.')) // webpack 上下文目录为项目根目录
    .entry('app') // 入口文件名称为 app
        .add('./src/main.js') // 入口文件为 ./src/main.ts
        .end()
    .output
        .path(path.join(__dirname, './dist')) // webpack 输出的目录为根目录的 dist 目录
        .filename('[name].[hash:8].js') // 打包出来的 bundle 名称为 "[name].[hash:8].js"
        .publicPath('/') // publicpath 配置为 "/"
        .end()
    .resolve
        .extensions
            .add('.js')
            .add('.vue') // 配置以 .js 等结尾的文件当模块使用的时候都可以省略后缀
            .end()
        .end()
    .module
        .rule('vue') // vue-loader 相关配置
            .test(/\.vue$/) // 匹配 .vue 文件
            .use('vue-loader')
                .loader('vue-loader')
                .end()
            .end()
        .rule('css') // css-loader 相关配置
            .test(/\.css$/)
            .use('vue-style-loader')
                .loader('vue-style-loader')
                .end()
            .use('css-loader')
                .loader('css-loader')
                .options({

                    esModule: false
                })
                .end()
            .end()
        .end()
    .plugin('vue-loader-plugin') // vue-loader 必须要添加 vue-loader-plugin
        .use(require('vue-loader').VueLoaderPlugin, [])
        .end()
    .plugin('html') // 添加 html-webpack-plugin 插件
        .use(require('html-webpack-plugin'), [
            {

                template: path.resolve(__dirname, './public/index.html'), // 指定模版文件
                chunks: ['app'], // 指定需要加载的 chunk
                inject: 'body', // 指定 script 脚本注入的位置为 body
            },
        ])
        .end()
    .devServer
        .host('0.0.0.0') // 服务器外部可访问
        .disableHostCheck(true) // 关闭白名单校验
        .contentBase(path.resolve(__dirname, './public')) // 设置一个 express 静态目录
        .historyApiFallback({

            disableDotRule: true, // 禁止在链接中使用 "." 符号
            rewrites: [
                {
     from: /^\/$/, to: '/index.html' }, // 将所有的 404 响应重定向到 index.html 页面
            ],
        })
        .port(8080) // 当前端口号
        .hot(true) // 打开页面热载功能
        .sockPort('location') // 设置成平台自己的端口
        .open(true);
module.exports = config.toConfig();
再看一下现在的样式,我们找到 src/app.vue 文件:
<style scoped>
    .app {
        color: red;
    }
</style>
上面的样式到底是怎样起作用的呢?
首先经过 vue-loader 处理一遍变成了这样:
.app[data-v-5ef48958] {

    color: red;
}
可以看到,我们样式经过 vue-loader 处理后加上了一个 “data-v-5ef48958”,这是为什么呢?因为我们在 style 标签上加了 scoped 标记:
<style scoped>
所以 vue-loader 会给所有的样式都加上一个 scoped 的属性。
vue-loader 处理过后就到了 css-loader,经过 css-loader 处理后:
// Imports
var ___CSS_LOADER_API_IMPORT___ = require("../node_modules/css-loader/dist/runtime/api.js");
var ___CSS_LOADER_EXPORT___ = ___CSS_LOADER_API_IMPORT___(function(i){
    return i[1]});
// Module
___CSS_LOADER_EXPORT___.push([module.id, "\n.app[data-v-5ef48958] {\n    color: red;\n}\n", ""]);
// Exports
module.exports = ___CSS_LOADER_EXPORT___;
可以看到,css-loader 处理过后会把样式都变成 module 形式,然后直接导出这个模块,模块中包含了 css 的源码跟模块的 id。
css-loader 处理过后会被 vue-style-loader 引用:
// style-loader: Adds some css to the DOM by adding a <style> tag

// load the styles
var content = require("!!../node_modules/css-loader/dist/cjs.js??ref--1-1!../node_modules/vue-loader/lib/loaders/stylePostLoader.js!../node_modules/vue-loader/lib/index.js??vue-loader-options!./app.vue?vue&type=style&index=0&id=5ef48958&scoped=true&lang=css&");
if(typeof content === 'string') content = [[module.id, content, '']];
if(content.locals) module.exports = content.locals;
// add the styles to the DOM
var add = require("!../node_modules/vue-style-loader/lib/addStylesClient.js").default
var update = add("d929f8d0", content, false, {
    });
// Hot Module Replacement
if(module.hot) {

 // When the styles change, update the <style> tags
 if(!content.locals) {

   module.hot.accept("!!../node_modules/css-loader/dist/cjs.js??ref--1-1!../node_modules/vue-loader/lib/loaders/stylePostLoader.js!../node_modules/vue-loader/lib/index.js??vue-loader-options!./app.vue?vue&type=style&index=0&id=5ef48958&scoped=true&lang=css&", function() {

     var newContent = require("!!../node_modules/css-loader/dist/cjs.js??ref--1-1!../node_modules/vue-loader/lib/loaders/stylePostLoader.js!../node_modules/vue-loader/lib/index.js??vue-loader-options!./app.vue?vue&type=style&index=0&id=5ef48958&scoped=true&lang=css&");
     if(typeof newContent === 'string') newContent = [[module.id, newContent, '']];
     update(newContent);
   });
 }
 // When the module is disposed, remove the <style> tags
 module.hot.dispose(function() {
     update(); });
}
上面代码中的 content 就是 css-loader 处理过后的模块。
我们看一下 update 方法的声明:
...
var add = require("!../node_modules/vue-style-loader/lib/addStylesClient.js").default
var update = add("d929f8d0", content, false, {
    });
...
可以看到,update 方法是通过 add 方法构建的,add 方法又是通过 !../node_modules/vue-style-loader/lib/addStylesClient.js 文件导入的,所以我们找到 !../node_modules/vue-style-loader/lib/addStylesClient.js 文件,我们直接定位到 xx/style-loader-demo/node_modules/vue-style-loader/lib/addStylesClient.js 文件:
...
var ssrIdKey = 'data-vue-ssr-id'
function createStyleElement () {

  var styleElement = document.createElement('style')
  styleElement.type = 'text/css'
  head.appendChild(styleElement)
  return styleElement
}

function addStyle (obj /* StyleObjectPart */) {

  var update, remove
  var styleElement = document.querySelector('style[' + ssrIdKey + '~="' + obj.id + '"]')

  if (styleElement) {

    if (isProduction) {

      // has SSR styles and in production mode.
      // simply do nothing.
...
可以看到,其实就是创建了一个 style 标签,然后直接插入到了 head 标签中,但是 vue-style-loader 除了插入 style 外,还做了一些服务端渲染的支持,所以如果你的 vue 项目是需要支持服务端渲染的时候,就需要用到 vue-style-loader了,原理是不是很简单呢?
style-loader
官网地址:https://github.com/webpack-contrib/style-loader
Inject CSS into the DOM.
哈哈,无语了,style-loader 甚至都懒得解释了。
ok!既然两位大佬官网都懒得解释了,那我们就只能自己去结合 Demo 看源码了。
我们先用一下 style-loader,我们修改一下 webpack.config.js 文件:
const path = require('path');
const config = new (require('webpack-chain'))();
config
    .context(path.resolve(__dirname, '.')) // webpack 上下文目录为项目根目录
    .entry('app') // 入口文件名称为 app
        .add('./src/main.js') // 入口文件为 ./src/main.ts
        .end()
    .output
        .path(path.join(__dirname, './dist')) // webpack 输出的目录为根目录的 dist 目录
        .filename('[name].[hash:8].js') // 打包出来的 bundle 名称为 "[name].[hash:8].js"
        .publicPath('/') // publicpath 配置为 "/"
        .end()
    .resolve
        .extensions
            .add('.js')
            .add('.vue') // 配置以 .js 等结尾的文件当模块使用的时候都可以省略后缀
            .end()
        .end()
    .module
        .rule('vue') // vue-loader 相关配置
            .test(/\.vue$/) // 匹配 .vue 文件
            .use('vue-loader')
                .loader('vue-loader')
                .end()
            .end()
        .rule('css') // css-loader 相关配置
            .test(/\.css$/)
            .use('style-loader')
                .loader('style-loader')
                .end()
            .use('css-loader')
                .loader('css-loader')
                .options({

                    esModule: false
                })
                .end()
            .end()
        .end()
    .plugin('vue-loader-plugin') // vue-loader 必须要添加 vue-loader-plugin
        .use(require('vue-loader').VueLoaderPlugin, [])
        .end()
    .plugin('html') // 添加 html-webpack-plugin 插件
        .use(require('html-webpack-plugin'), [
            {

                template: path.resolve(__dirname, './public/index.html'), // 指定模版文件
                chunks: ['app'], // 指定需要加载的 chunk
                inject: 'body', // 指定 script 脚本注入的位置为 body
            },
        ])
        .end()
    .devServer
        .host('0.0.0.0') // 服务器外部可访问
        .disableHostCheck(true) // 关闭白名单校验
        .contentBase(path.resolve(__dirname, './public')) // 设置一个 express 静态目录
        .historyApiFallback({

            disableDotRule: true, // 禁止在链接中使用 "." 符号
            rewrites: [
                {
     from: /^\/$/, to: '/index.html' }, // 将所有的 404 响应重定向到 index.html 页面
            ],
        })
        .port(8080) // 当前端口号
        .hot(true) // 打开页面热载功能
        .sockPort('location') // 设置成平台自己的端口
        .open(true);
module.exports = config.toConfig();
可以看到,我们把 vue-style-loader 换成了 style-loader:
...
.rule('css') // css-loader 相关配置
            .test(/\.css$/)
            .use('style-loader')
                .loader('style-loader')
                .end()
            .use('css-loader')
                .loader('css-loader')
                .options({

                    esModule: false
                })
                .end()
...
然后再次运行一下 npm run dev 命令看效果:
npm run dev
可以看到,跟 vue-style-loader 的效果是一样的,这是为什么呢?
跟前面 vue-style-loader 分析方式一样,我们先看一下现在的样式,我们找到 src/app.vue 文件:
<style scoped>
    .app {
        color: red;
    }
</style>
上面的样式到底是怎样起作用的呢?
首先经过 vue-loader 处理一遍变成了这样:
.app[data-v-5ef48958] {

    color: red;
}
可以看到,我们样式经过 vue-loader 处理后加上了一个 “data-v-5ef48958”,这是为什么呢?因为我们在 style 标签上加了 scoped 标记:
<style scoped>
所以 vue-loader 会给所有的样式都加上一个 scoped 的属性。
vue-loader 处理过后就到了 css-loader,经过 css-loader 处理后:
// Imports
var ___CSS_LOADER_API_IMPORT___ = require("../node_modules/css-loader/dist/runtime/api.js");
var ___CSS_LOADER_EXPORT___ = ___CSS_LOADER_API_IMPORT___(function(i){
    return i[1]});
// Module
___CSS_LOADER_EXPORT___.push([module.id, "\n.app[data-v-5ef48958] {\n    color: red;\n}\n", ""]);
// Exports
module.exports = ___CSS_LOADER_EXPORT___;
可以看到,css-loader 处理过后会把样式都变成 module 形式,然后直接导出这个模块,模块中包含了 css 的源码跟模块的 id。
到这里其实都跟前面 vue-style-loader 方式一样。
css-loader 处理过后会被 style-loader 引用,代码变成了这样:
import api from "!../node_modules/style-loader/dist/runtime/injectStylesIntoStyleTag.js";
            import content from "!!../node_modules/css-loader/dist/cjs.js??ref--1-1!../node_modules/vue-loader/lib/loaders/stylePostLoader.js!../node_modules/vue-loader/lib/index.js??vue-loader-options!./app.vue?vue&type=style&index=0&id=5ef48958&scoped=true&lang=css&";

var options = {
    };

options.insert = "head";
options.singleton = false;

var update = api(content, options);


if (module.hot) {

  if (!content.locals || module.hot.invalidate) {

    var isEqualLocals = function isEqualLocals(a, b, isNamedExport) {

  if (!a && b || a && !b) {

    return false;
  }

  var p;

  for (p in a) {

    if (isNamedExport && p === 'default') {

      // eslint-disable-next-line no-continue
      continue;
    }

    if (a[p] !== b[p]) {

      return false;
    }
  }

  for (p in b) {

    if (isNamedExport && p === 'default') {

      // eslint-disable-next-line no-continue
      continue;
    }

    if (!a[p]) {

      return false;
    }
  }

  return true;
};
    var oldLocals = content.locals;

    module.hot.accept(
      "!!../node_modules/css-loader/dist/cjs.js??ref--1-1!../node_modules/vue-loader/lib/loaders/stylePostLoader.js!../node_modules/vue-loader/lib/index.js??vue-loader-options!./app.vue?vue&type=style&index=0&id=5ef48958&scoped=true&lang=css&",
      function () {

        if (!isEqualLocals(oldLocals, content.locals, undefined)) {

                module.hot.invalidate();

                return;
              }

              oldLocals = content.locals;

              update(content);
      }
    )
  }

  module.hot.dispose(function() {

    update();
  });
}

export default content.locals || {
    };
可以看到,上面的代码:
import api from "!../node_modules/style-loader/dist/runtime/injectStylesIntoStyleTag.js";
            import content from "!!../node_modules/css-loader/dist/cjs.js??ref--1-1!../node_modules/vue-loader/lib/loaders/stylePostLoader.js!../node_modules/vue-loader/lib/index.js??vue-loader-options!./app.vue?vue&type=style&index=0&id=5ef48958&scoped=true&lang=css&";
...
content 就是 css-loader 处理过后的 css样式模块,包含了 css 源码跟 moduleid,那么 这里的 api 是啥呢?我们找到 xxx/style-loader-demo/node_modules/style-loader/dist/runtime/injectStylesIntoStyleTag.js 文件:
...
function insertStyleElement(options) {

  var style = document.createElement('style');
  var attributes = options.attributes || {
    };

  if (typeof attributes.nonce === 'undefined') {

    var nonce = typeof __webpack_nonce__ !== 'undefined' ? __webpack_nonce__ : null;

    if (nonce) {

      attributes.nonce = nonce;
    }
  }

  Object.keys(attributes).forEach(function (key) {

    style.setAttribute(key, attributes[key]);
  });

  if (typeof options.insert === 'function') {

    options.insert(style);
  } else {

    var target = getTarget(options.insert || 'head');

    if (!target) {

      throw new Error("Couldn't find a style target. This probably means that the value for the 'insert' parameter is invalid.");
    }

    target.appendChild(style);
  }

  return style;
}

function removeStyleElement(style) {

  // istanbul ignore if
  if (style.parentNode === null) {

    return false;
  }

  style.parentNode.removeChild(style);
}
/* istanbul ignore next  */


var replaceText = function replaceText() {

  var textStore = [];
  return function replace(index, replacement) {

    textStore[index] = replacement;
    return textStore.filter(Boolean).join('\n');
  };
}();

function applyToSingletonTag(style, index, remove, obj) {

  var css = remove ? '' : obj.media ? "@media ".concat(obj.media, " {").concat(obj.css, "}") : obj.css; // For old IE

  /* istanbul ignore if  */

  if (style.styleSheet) {

    style.styleSheet.cssText = replaceText(index, css);
  } else {

    var cssNode = document.createTextNode(css);
    var childNodes = style.childNodes;

    if (childNodes[index]) {

      style.removeChild(childNodes[index]);
    }

    if (childNodes.length) {

      style.insertBefore(cssNode, childNodes[index]);
    } else {

      style.appendChild(cssNode);
    }
  }
}

function applyToTag(style, options, obj) {

  var css = obj.css;
  var media = obj.media;
  var sourceMap = obj.sourceMap;

  if (media) {

    style.setAttribute('media', media);
  } else {

    style.removeAttribute('media');
  }

  if (sourceMap && typeof btoa !== 'undefined') {

    css += "\n/*# sourceMappingURL=data:application/json;base64,".concat(btoa(unescape(encodeURIComponent(JSON.stringify(sourceMap)))), " */");
  } // For old IE

  /* istanbul ignore if  */


  if (style.styleSheet) {

    style.styleSheet.cssText = css;
  } else {

    while (style.firstChild) {

      style.removeChild(style.firstChild);
    }

    style.appendChild(document.createTextNode(css));
  }
}

var singleton = null;
var singletonCounter = 0;

function addStyle(obj, options) {

  var style;
  var update;
  var remove;

  if (options.singleton) {

    var styleIndex = singletonCounter++;
    style = singleton || (singleton = insertStyleElement(options));
    update = applyToSingletonTag.bind(null, style, styleIndex, false);
    remove = applyToSingletonTag.bind(null, style, styleIndex, true);
  } else {

    style = insertStyleElement(options);
    update = applyToTag.bind(null, style, options);

    remove = function remove() {

      removeStyleElement(style);
    };
  }

  update(obj);
  return function updateStyle(newObj) {

    if (newObj) {

      if (newObj.css === obj.css && newObj.media === obj.media && newObj.sourceMap === obj.sourceMap) {

        return;
      }

      update(obj = newObj);
    } else {

      remove();
    }
  };
}

module.exports = function (list, options) {

  options = options || {
    }; // Force single-tag solution on IE6-9, which has a hard limit on the # of <style>
  // tags it will allow on a page

  if (!options.singleton && typeof options.singleton !== 'boolean') {

    options.singleton = isOldIE();
  }

  list = list || [];
  var lastIdentifiers = modulesToDom(list, options);
  return function update(newList) {

    newList = newList || [];

    if (Object.prototype.toString.call(newList) !== '[object Array]') {

      return;
    }

    for (var i = 0; i < lastIdentifiers.length; i++) {

      var identifier = lastIdentifiers[i];
      var index = getIndexByIdentifier(identifier);
      stylesInDom[index].references--;
    }

    var newLastIdentifiers = modulesToDom(newList, options);

    for (var _i = 0; _i < lastIdentifiers.length; _i++) {

      var _identifier = lastIdentifiers[_i];

      var _index = getIndexByIdentifier(_identifier);

      if (stylesInDom[_index].references === 0) {

        stylesInDom[_index].updater();

        stylesInDom.splice(_index, 1);
      }
    }

    lastIdentifiers = newLastIdentifiers;
  };
};
可以看到,其实跟 vue-style-loader 一样,也是往 head 标签中注入一个 style 标签:

但是 style-loader 除了支持普通的注入 style 外,还支持以下模式:
- linkTag:生成一个 link 标签,把 css-loader 处理过后的值赋给 link 标签的 href 属性。
- lazyStyleTag & lazySingletonStyleTag:懒注入 style 标签。
- styleTag & singletonStyleTag:默认方式,直接注入 style 标签。
ok!我们拿一种方式操作一下,我们用一下 lazySingletonStyleTag。
首先我们创建一个 loaders 目录,然后在 loaders 目录下创建一个 customer-style-loader.js 文件:
mkdir loaders && touch loaders/customer-style-loader.js
然后将以下代码写入 loaders/customer-style-loader.js 文件:
module.exports=function (source) {

    return `
        ${
      source}
        setTimeout(()=>{
            alert("来来来,show style!")
            exported && exported.use && exported.use();
        },5000);
    `;
}
可以看到,我们延迟了 5s 去显示我们的样式,然后我们找到 webpack.config.js 引入我们的 customer-style-loader.js,并且把 style-loader 的 injectType 设置成 lazySingletonStyleTag:
const path = require('path');
const config = new (require('webpack-chain'))();
config
    .context(path.resolve(__dirname, '.')) // webpack 上下文目录为项目根目录
        .entry('app') // 入口文件名称为 app
        .add('./src/main.js') // 入口文件为 ./src/main.ts
        .end()
    .output
        .path(path.join(__dirname, './dist')) // webpack 输出的目录为根目录的 dist 目录
        .filename('[name].[hash:8].js') // 打包出来的 bundle 名称为 "[name].[hash:8].js"
        .publicPath('/') // publicpath 配置为 "/"
        .end()
    .resolve
        .extensions
            .add('.js')
            .add('.vue') // 配置以 .js 等结尾的文件当模块使用的时候都可以省略后缀
            .end()
        .end()
    .module
        .rule('vue') // vue-loader 相关配置
            .test(/\.vue$/) // 匹配 .vue 文件
            .use('vue-loader')
                .loader('vue-loader')
                .end()
            .end()
        .rule('css') // css-loader 相关配置
            .test(/\.css$/)
            .use('customer-style-loader')
                .loader(path.resolve("./loaders/customer-style-loader.js"))
                .end()
            .use('vue-style-loader')
                .loader('style-loader')
                .options({

                    injectType: "lazySingletonStyleTag"
                })
                .end()
            .use('css-loader')
                .loader('css-loader')
                .options({

                    esModule: false
                })
                .end()
            .end()
        .end()
    .plugin('vue-loader-plugin') // vue-loader 必须要添加 vue-loader-plugin
        .use(require('vue-loader').VueLoaderPlugin, [])
        .end()
    .plugin('html') // 添加 html-webpack-plugin 插件
        .use(require('html-webpack-plugin'), [
            {

                template: path.resolve(__dirname, './public/index.html'), // 指定模版文件
                chunks: ['app'], // 指定需要加载的 chunk
                inject: 'body', // 指定 script 脚本注入的位置为 body
            },
        ])
        .end()
    .devServer
        .host('0.0.0.0') // 服务器外部可访问
        .disableHostCheck(true) // 关闭白名单校验
        .contentBase(path.resolve(__dirname, './public')) // 设置一个 express 静态目录
        .historyApiFallback({

            disableDotRule: true, // 禁止在链接中使用 "." 符号
            rewrites: [
                {
     from: /^\/$/, to: '/index.html' }, // 将所有的 404 响应重定向到 index.html 页面
            ],
        })
        .port(8080) // 当前端口号
        .hot(true) // 打开页面热载功能
        .sockPort('location') // 设置成平台自己的端口
        .open(true);
module.exports = config.toConfig();
然后运行 npm run dev 命令打开浏览器看效果:
npm run dev

可以看到,当我们刷新页面后,“hello” 一开始是没有样式的,然后过后 5s 后弹出 alert 点击 “确定” 后才有样式的。
ok!style-loader 还有一些其它的功能,我就不演示了,小伙伴自己去研究哦!
总结
vue-style-loader 跟 style-loader 基本用法跟功能是一样的,都是往 dom 里面插入一个 style 标签去让样式生效的,但是 vue-style-loader 支持 vue 中的 ssr(服务端渲染),所以如果需要支持服务端渲染的 vue 项目,就需要用到 vue-style-loader了,如果一般的 vue 项目的话,推荐使用 style-loader,毕竟 style-loader 支持的功能还是丰富些,比如可以懒注入、可以指定位置插入标签等等。
智能推荐
王者竞速游戏服务器维护了,《王者荣耀》不停机更新维护-程序员宅基地
文章浏览阅读170次。今天王者荣耀的服务器似乎出了点小问题,玩家在游戏里出现了许多BUG,所以官方对全服的玩家进行了一次不停机的更新,那么此次更新的内容相信大家都很想知道吧,小编为大家整理了相关的资讯,感兴趣的玩家就跟着小编一起来看看吧,希望能帮到你。王者荣耀7月17日进行了不停机更新维护,下面给大家带来具体的更新内容,一起来看看吧。亲爱的召唤师:我们计划在2019年7月17日 8:30-9:30 对全服进行不停机更新..._为什么王者荣耀今天不停机
将LGBM用作二分类问题之上_matlablgbm模型-程序员宅基地
文章浏览阅读460次,点赞8次,收藏9次。LGBM(Light Gradient Boosting Machine)可以用于解决二分类问题。事实上,LGBM在实际应用中被广泛用于分类问题,包括二分类问题。在使用LGBM进行二分类问题时,你可以指定目标变量的类型和相关参数。对于二分类问题,你可以使用。指定了二分类问题的目标。你可以根据具体问题和数据集的特点调整其他参数,以优化模型性能。表示使用对数损失作为损失函数,是二分类问题的默认设置。被用于创建一个二分类模型,_matlablgbm模型
Java包装类;基本数据类型与字符串的相互转换_java 基本类型转包装类-程序员宅基地
文章浏览阅读531次。Java包装类;基本数据类型与字符串的相互转换_java 基本类型转包装类
【重构架构设计】_重构设计-程序员宅基地
文章浏览阅读368次,点赞9次,收藏9次。通过以上两个示例,可以看到领域驱动设计的特点:每个领域都有自己的模型(User和Order类),聚合根(User和Order类的实例)和业务逻辑(changePassword、addItem等方法)。引入领域驱动设计(DDD):DDD是一种面向领域模型设计的方法,通过将业务领域划分为多个小的子领域来进行解耦。通过使用微服务架构,可以将系统解耦为多个独立的服务,提高系统的可用性和可伸缩性。通过以上的步骤,可以有效进行业务解耦,提高代码的高可用性和可维护性。在订单管理领域中,专注于订单的信息、行为和业务规则。_重构设计
cvc-complex-type.2.4.c: The matching wildcard is strict, but no declaration的解决-程序员宅基地
文章浏览阅读2.3w次,点赞7次,收藏12次。导入了一个工程,编译什么的都还好,但是报了一个XML的错误。cvc-complex-type.2.4.c: The matching wildcard is strict, but no declaration can be found for element 'dubbo:application'. 具体错误如下:Multiple annotations found at this line: ..._cvc-complex-type.2.4.c: the matching wildcard is strict, but no declaration
如何避免对话冲突-《关键对话》笔记与心得_关键对话 为什么我们会面临关键冲突-程序员宅基地
文章浏览阅读1.9k次。 目录 1~关键对话的含义2~关键对话的目标3~处在关键对话场景下的心理状态4~好公司和差公司的区别5~ 关键对话的重要性6~跟踪表现良好的人行为7~专注于真正想要的结果8~ 谈话禁忌9~决策的四种方式 自勉1~关键对话的含义两个或更多人参与讨论,条件:1)事关重大ps: 个..._关键对话 为什么我们会面临关键冲突
随便推点
掌握之分布式-6.分布式数据库-程序员宅基地
文章浏览阅读162次。掌握高并发、高可用架构第三章 分布式本章介绍分布式架构的底层技术。主要说明面试过程中可能被问到的技术点。第六节 分布式数据库MyCat分库分表 Sharding1. 分库分表的方法垂直切分,也就是因为表多而数据多,将关系紧密(比如统一模块)的表切分出来放到一个服务器中水平切分,表不多,而是表中数据量庞大,也就是把表的数据按照某种规则切分到多个服务器中现实中多是这两种的混合2. 分..._分布式数据库使用group by 代价大吗
克隆的虚拟机无法修改静态ip_vm克隆的虚拟机ip不能改为静态ip-程序员宅基地
文章浏览阅读547次。job for network.service failedsystemctl restart network.service failed造成这种情况,一般可能是由于克隆的虚拟机,MAC地址与本机的对应不上,所以需要修改MAC地址与本机对应上。ip addr#查看本机的MAC地址vim /etc/sysconfig/network-script/ifcfg-ens33#修改MAC地址有时候ip地址会莫名的消失,因为有2套网络管理工具将NetworkManager关闭systemctl s_vm克隆的虚拟机ip不能改为静态ip
OpenOCD的调试_c# openocd的配置-程序员宅基地
文章浏览阅读4.3k次,点赞2次,收藏5次。1、工具本文使用的软、硬件工具如下:目标开发板:STSPEAr310EVB2.0(官网www.st.com)及其交叉编译环境。仿真器:OpenJTAG(官网www.100ask.net)驱动(www.ftdichip.com/Drivers/D2XX.htm)操作系统:Fedora(官网fedoraproject.org)调试软件:openocd(官网openocd.sourceforge.net)2、安装OpenJTAG驱动本文不介绍交叉编译环境的安装,若有需要请..._c# openocd的配置
JDBCRealm Http Digest-程序员宅基地
文章浏览阅读89次。2019独角兽企业重金招聘Python工程师标准>>> ..._password bf9f8d1f05dc08cc3b02e8fcf2c2ba57
探秘User-Agents:一个强大的网络嗅探与模拟库-程序员宅基地
文章浏览阅读868次,点赞22次,收藏16次。探秘User-Agents:一个强大的网络嗅探与模拟库项目地址:https://gitcode.com/intoli/user-agents在互联网的世界中,User-Agent 是你的浏览器向服务器透露其身份的一种方式。它包含了浏览器类型、版本信息,甚至操作系统和设备详情。intoli/user-agents 是一个精心打造的Python库,可以帮助开发者轻松地生成、解析和模拟User-A...
顾险峰:当深度学习遇到3D_深度学习 3d成型-程序员宅基地
文章浏览阅读802次。转载自:老顾谈几何(ID:conformalgeometry)作者:顾险峰本文7647字,建议阅读20分钟。本文中顾险峰老师分享了传统几何理论和方法与深度学习融合的相关知识。2019年10月底11月初,国际计算机视觉大会(ICCV 2019)在韩国首尔举行,参会学者多达七千五百多人,创了历史记录。大会接收论文一千多篇,排在前几位的论文关键词是:图像(image),物体(object..._深度学习 3d成型